This article is available with Digimaster 3 odometer correction tool user manual including:
Software Installation
-Install D3 tool
-Connect the D3 with PC and internet
-Remote Assistance
-Kernel renovation
Software Activation
Software Upgrade
In detail…
Software Installation
1.Install D3 tool
Step 1: Double-click the installation files in the CD
Step 2: Choose the route of Installation
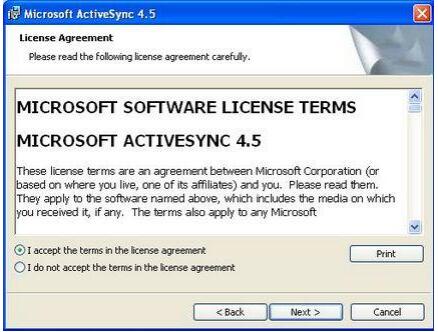
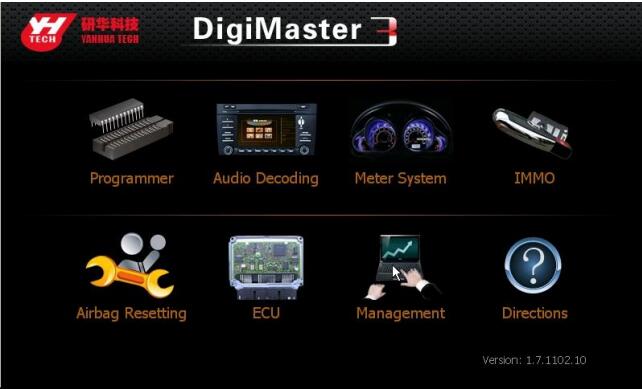
Step 3: Open the software interface as below after installation
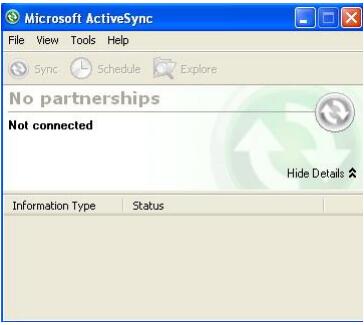
2.Connect the D3 with PC and internet
Step 1: Connect the D3 USB with PC
Click “Cancel” after the window bombed as below
Step 2: Click “OK” to close the bombed warning dialog

Step 3: The following window will appear after successful connecting with device
Step 4: Just reconnect the USB cable if the USB connecting is cut showed as below window
Please kindly notice:
Insert the connector of LAN cable into RJ45 LAN connector of D3 to make online update
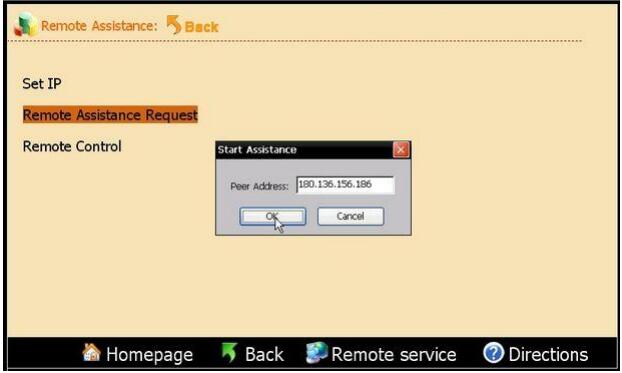
3.Remote Assistance
The YANHUA engineers will provide you on-line technology support via internet when you choose long-distance assistance function.
Step 1: Please contact the distributor to obtain an IP before the Remote Assistance
Then connect your Digimaster 3 master with internet
Step 2: Open D3 Tool software to enter “Remote Assistance”
Then select “Require Remote Assistance”

Step 3: Input the obtained IP and click “OK” in the bombed window¡£
4.Kernel renovation
Note: Please don’t try easily because Kernel Renovation being hazardous. Normally it is used on the useless because of the lose of kernel.
Step 1: Click keystoke “8” and “OK” together, then power on
The indication of “Press OK to continue and ESC to cancel” will appear on the screen
Press “OK” into Renovation
Step 2: “Found new hardware” is found in the system when you connect USB cable with the PC
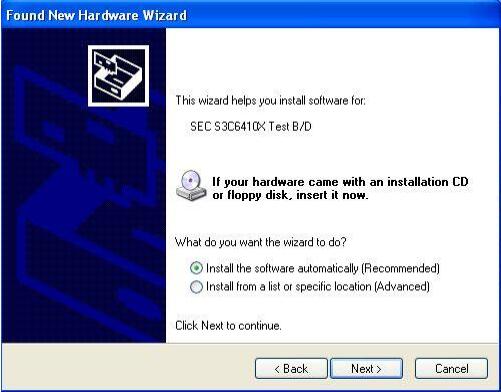
Step 3: Choose “Install software automatically”, Click “next”
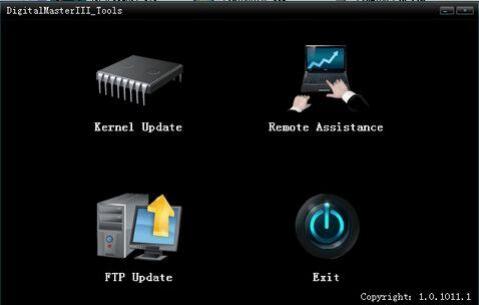
Step 4: Running D3 tool software, choose “KERNEL update”
Step 5: Indication “USB connect successfully” will appear as below after the USB is connected
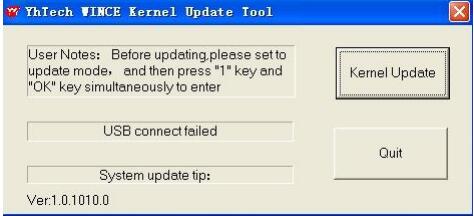
Step 6: Click “KernelUpdate”, choose kernel files, and then click “OK” to start renovation
Step 7: Several minutes is need for kernel renovation.
It is finished when the indication of “USB connect failed” appear.
Software Activation
This guide helps you checking accessories£¬ complete the activation£¬ authorization and updating.
1.Activation
Digimaster-III needs to be activated on line with the Activation code provided by us in the first using.
You can activate and recharge Digimaster-III by the following steps.
Step 1: Power on and connect the D3 with internet.
The unactivated £DD3 show as below
Click “OK” to start activation
Step 2: Input the validation code in the left dialog
Click “next” to download update programme and management programme
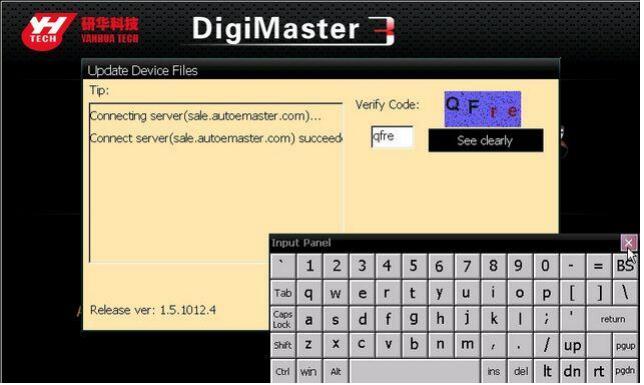
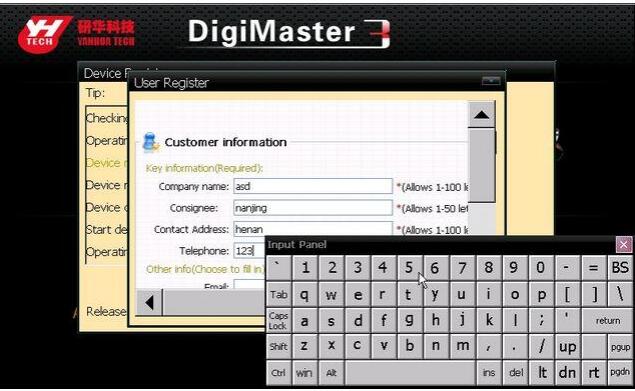
Step 3: Activation window will appear after downloading Management programme
Please input your information
Step 4: Enter the activation code and password provided by sales then click “next”

2.Paymemt
Step 1: Recharge dialog will appear after D3 activation in the first use. If no, click “Payment” in “management center” to start recharging.

Step 2: Input the Recharging code and password provide by the sales
And click “Next”
Step 3: Click “Finish” to finish the recharging after reminding of successful Payment appear
Software Upgrade
Here provides frequent upgrade of software & hardware programme. New vehicle models or amend hole in order to improve the functions of Digimaster-III. Please note the upgrade info in website http://www.autoemaster.com/en/.
Step 1:
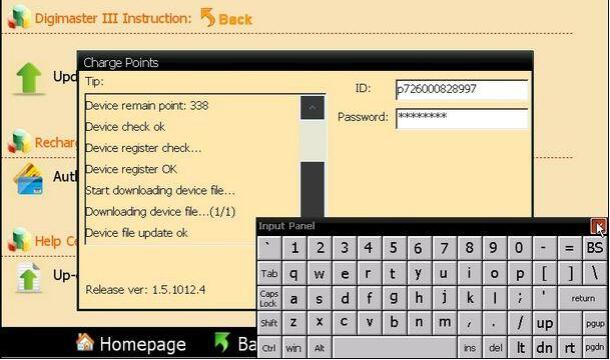
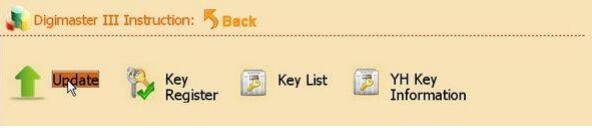
Click “Software upgrade” to find new upgrade
Input the Validation code in the dialog to start download and upgrade
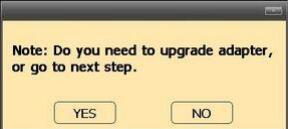
Step 2: It will remind you whether you need adapter upgrade after software update
Click “YES” to start adapter upgrade
Click “NO” to next step (No need to upgrade adapter frequently)
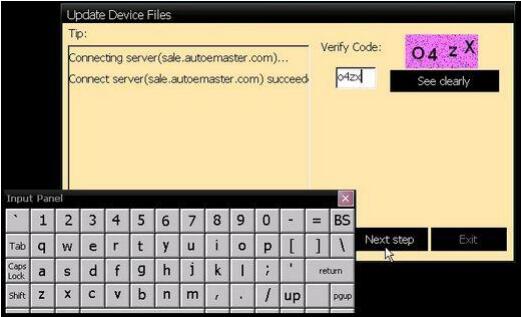
Step 3: Enter the verify code and click “Next”
The D3 will restart automatically after software upgrade
That’s all. Hope it helps you.
